
Introduction
Work Items (Projects, Milestones, Tasks, etc.) are displayed in detailed modular views. This section describes the different panels and elements in the modular view.
Go to:
- View Navigator
- Team Panel
- Grid
- Searching and Filtering
- Ribbon
- Relations Panel
- Scheduling Status
- Properties Card
View Navigator
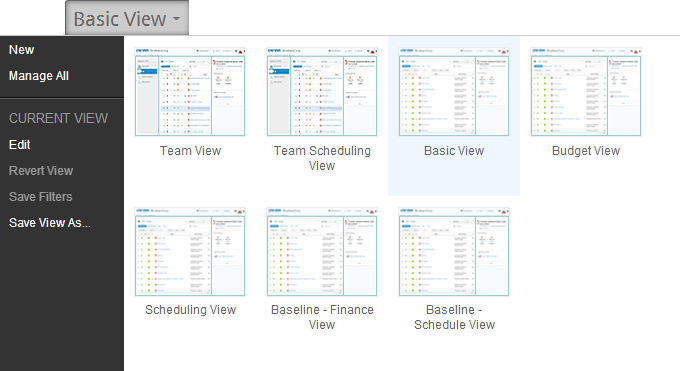
Clarizen's default view options vary from module to module.
The figure below shows the Work Items module default view options.
Team Panel
The Work Items module supports adding Clarizen's Team Panel to the view.
The addition of the Team Panel creates a team-centric view to better assist with team collaboration on all deliverables.
- Click here for more on team-centric views and the Team Panel
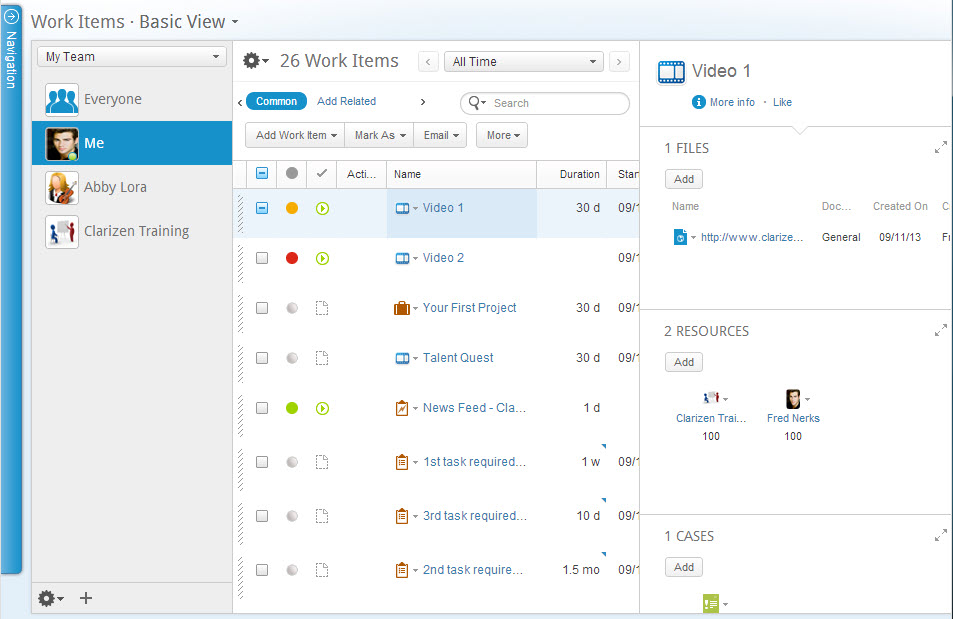
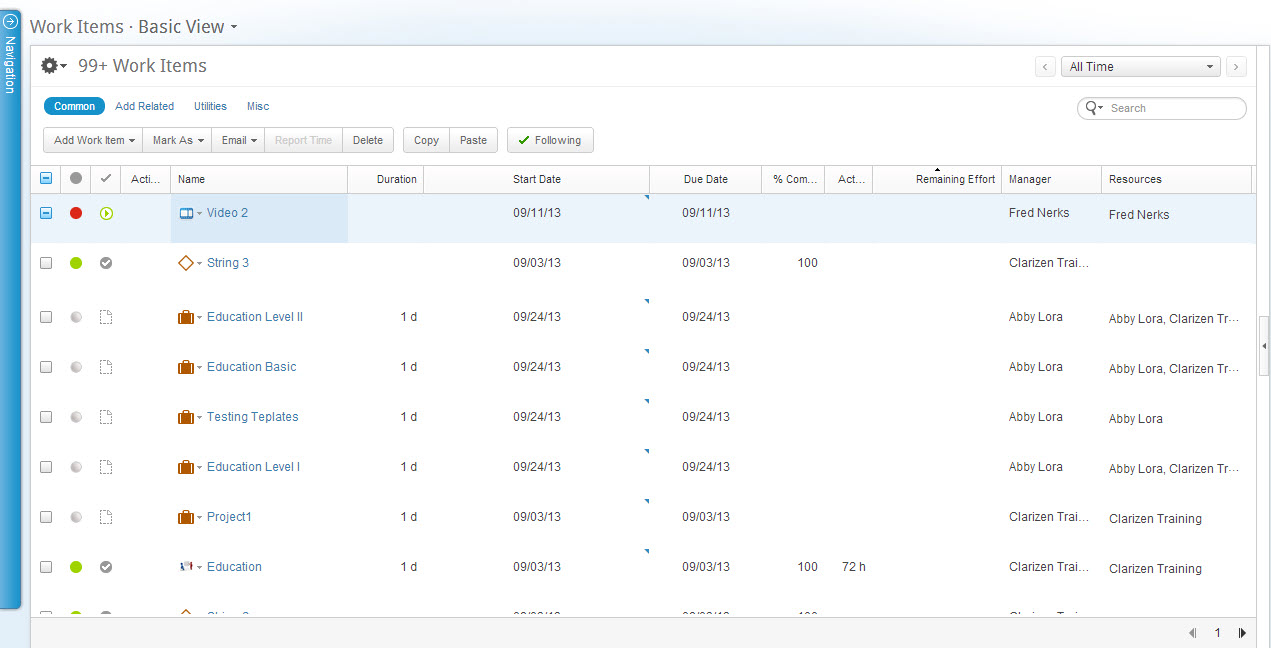
Grid
The grid is Clarizen's standard data table display for viewing, managing and editing data and items in most modules.
A grid display is one of three display type options used to configure several of the out-of-the-box view options available in the View Navigator for most modules.
Using the Time Range Filter enables filtering the grid to show items and events occurring during the actual period/date(s) defined.
Clicking the icon, located above the ribbon enables managing grid column sets which can then be further filtered and sorted.
Searching and Filtering
The Work Items module can be searched and filtered for items and data using the Contextual Search and the Time Range Filter.
The Results Format can be customized to return specific type of results.
- Click the Gear icon

- In Results Format, Retain Hierarchy is the Default.
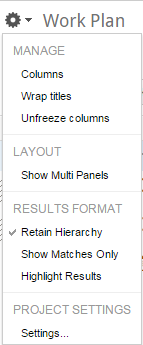
Options are:
- Retain Hierarchy - search results will retain the hierarchy or keep the existing project structure in the context of your view
- Show Matches Only - This search option will only display items with the selected keyword
- Highlight Results - This search result view option marks the relevant results in context of the entire view, this can be useful if the number of items displayed are minimal however for large projects we recommend using the retain hierarchy option.
Note: Clarizen can be searched globally using the Global Search tool.
Ribbon
The Work Items module ribbon, located under the masthead (at the top-left) provides controls for performing actions on selected items.

Relations Panel
The Work Items module grid displays include the Relations Panel, located on the right-hand side of the screen.
The Relations Panel displays any related items, such as assigned resources, files, and discussions, etc.) of a selected item type in the grid, and enables working with the related items while staying in context of your original view.
You can also view cases including bugs, issues and requests as separate relation items in the Related Items Panel.
The panel is blank when multiple items are selected.
Scheduling Status
The Scheduling Status of work items is displayed with either a Green, Orange or Red colored button, representing a status of On Track, At Risk or Off Track respectively.
Scheduling Status Calculation
The scheduling status is calculated by looking at the Actual Percent Completed versus the Expected Percent Completed.
Leaf Tasks
The scheduling status of leaf tasks (tasks that have no sub tasks) is as follows:
 On Track (Green)
- If the Actual Percent Completed is under 10% less than the Expected Percent Completed or Actual Percent Completed is greater than the Expected Percent Completed
 At Risk (Orange)
- If the Actual Percent Completed is 10% or more below the Expected Percent Completed
 Off Track (Red)
- The due date of the task has passed and the Actual Percent Completed is less than 100%
Hammock Work Items
Hammock Work Items are calculated in the same way as Leaf Work Items, unless one or more of the hammock's sub-Work Items are on the critical path. In such cases, the status of the hammock is calculated as a combination of Status fields for active Sub-Work Items on the critical path, and the summary Status of the hammock.
If the hammock's Due Date has passed, its Status overrides any other calculations and becomes Off Track (red).
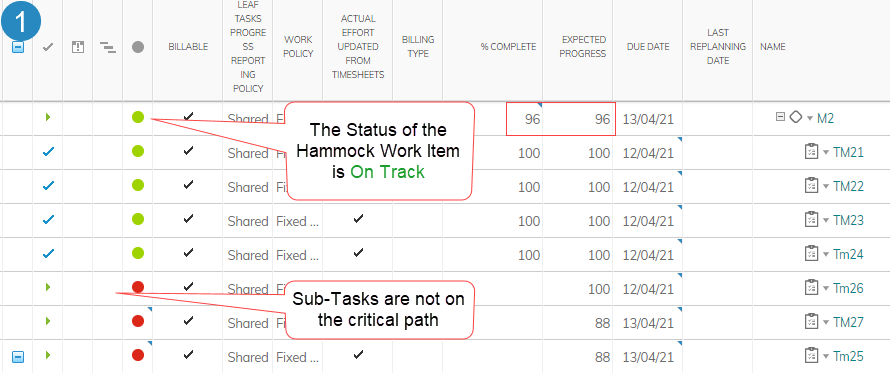
Example 1
The Status of the hammock is On Track (same or less than 10% different from the expected progress), based on the aggregated Status of its sub-Work Items; some of which are Off Track. In this case, the aggregated status is the same as the expected progress (96%), and the sub-Work Item that is Off Track does not affect the hammock Status as its not on a critical path.
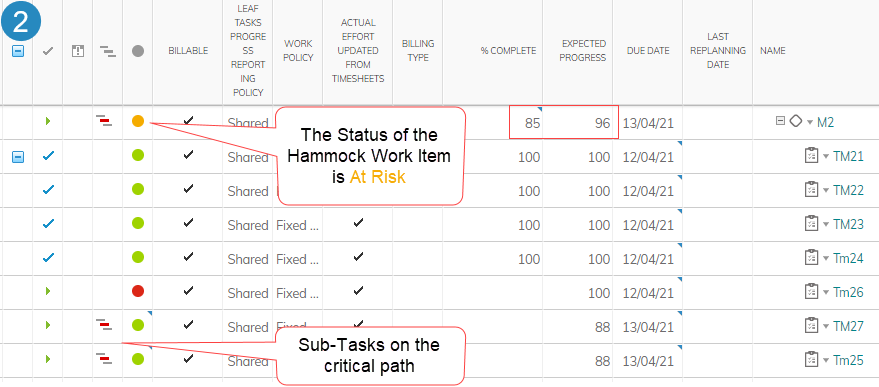
Example 2
The Status of Sub-Items on the critical path can be Green, but the 85% complete rate of the hammock vs. the expected progress of 96% turns the Status to At Risk (orange).
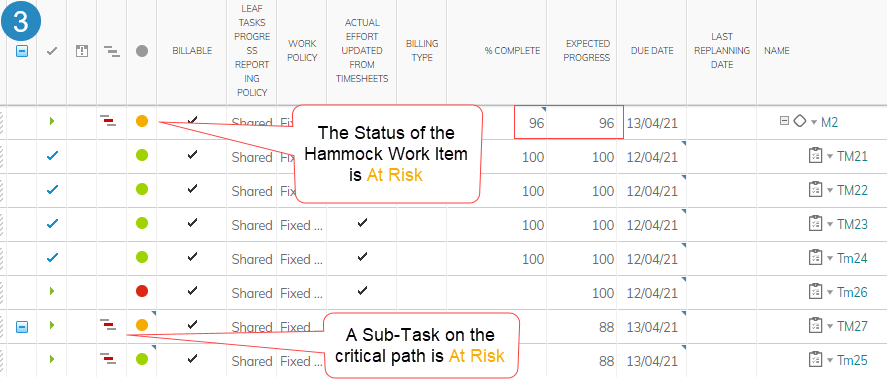
Example 3
In this case, the actual and expected progress are both 96%, however, a Sub-Work Item on the critical path is Off Track, and therefore the hammock Status is At Risk.
Example 4
In this case, the Due Date of the hammock is in the past and therefore its Status overrides all other calculations.

Properties Card
Properties cards can be accessed from the Work Items, Projects, Milestones and Tasks modules by selecting items in the grid, and clicking  located in the Relations Panel.
Schedule Settings
This page describes work item schedule settings and includes the following sections:
- Setting Constraint Type
- Setting Default Work Policy
- Setting Leaf Tasks Progress Reporting Policy
- Setting Rollup Progress and Dates from Shortcut
Setting Constraint Type
- Navigate to a work item Properties Card.
- Click
 and scroll down to the Schedule Settings section.
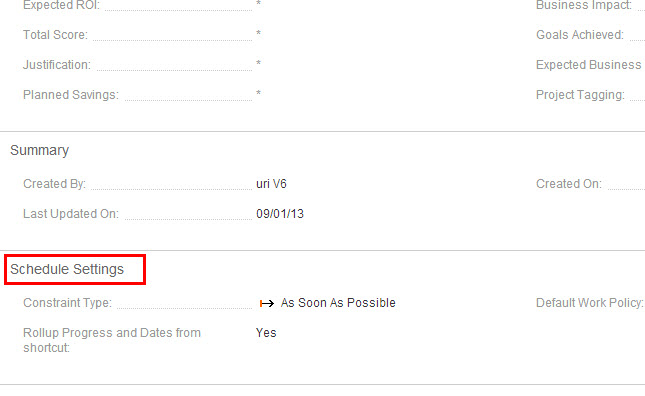
Figure 1: Schedule Settings - Click the Constraint Type value field to activate the dialog.

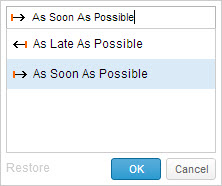
Figure 2: Constraint Type Dialog - Define the required constraint type.
- Click

The dialog closes.
The work item constraint type setting is set as defined.
The change appears in the Properties Card Schedule Settings section.
Setting Default Work Policy
For more about Work Policies, click here.
- Follow Steps 1 and 2 of the above procedure.
- Click the Default Work Policy field to activate the dialog.

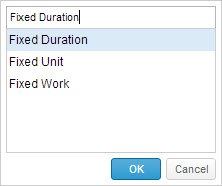
Figure 3: Default Work Policy Dialog - Define the default work policy.
- Click
The dialog closes.
The work item default work policy setting is set as defined.
The change appears in the Properties Card Schedule Settings section.
Setting Leaf Tasks Progress Reporting Policy
- Follow Steps 1 and 2 of the first procedure on this page.
- Click the Leaf Tasks Progress Reporting Policy field to activate the dialog.


Figure 4: Leaf Task Progress Reporting Policy - Define the Leaf task progress reporting policy.
- Click
The dialog closes.
The work item Leaf task progress reporting policy setting is set as defined.
The change appears in the Properties Card Schedule Settings section.
Setting Rollup Progress and Dates from Shortcut
- Follow Steps 1 and 2 of the first procedure on this page.
- Click the Rollup Progress and Dates from shortcut field to activate the control.

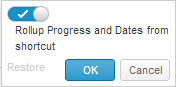
Figure 5: Rollup Progress and Dates from Shortcut Control - Click
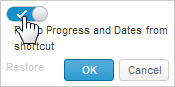
 changes to
- Click
The dialog closes.
The work item Rollup Progress and Dates from Shortcut setting is set as defined.
The change appears in the Properties Card Schedule Settings section.
Tip:
The option to click the Restore link restores the setting to its previous setting.
Finance Settings
Note:
Finance Settings is definable by Financial users only.
This page describes work item finance settings and includes the following sections:
- About Financial Settings
- Setting Work Item as Billable
- Rolling up Financial and Effort Data from a Shortcut
About Financial Settings
The financial settings of work items can only be defined by your organization's Clarizen Financial users.
This section enables setting work items as billable project items, rolling up financial and effort data from shortcuts and setting cost and revenue currency types.
Setting Work Items as Billable
- Navigate to a work item Properties Card.
- Click
 and scroll down to the Financial Settings section.
 - Click the Billable field to make it active.

The control opens.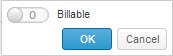
- Click

The control becomes
- Click

The work item is set as billable.
Setting Rollup Financial and Effort Data from a Shortcut
- Navigate to a work item Properties Card.
- Click and scroll down to the Financial Settings section.
- Click the Rollup Financial and Effort Data from shortcut field to make it active.

The control opens.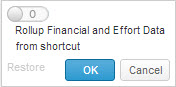
- Click
The control becomes - Click
Rollup Financial and Effort Data from a Shortcut is set.
Time Report Settings
This page describes Time Report settings and includes the following sections:
- Setting Work Items as Reportable
- Reportable Start Date
- Setting Work Items as Non-reportable
- Excluding Entire or Specific Work Items
- Setting Actual Effort Updated from Timesheets
Setting Work Items as Reportable
- Navigate to a work item Properties Card.
- Click
 and scroll down to the Time Reporting Settings section.
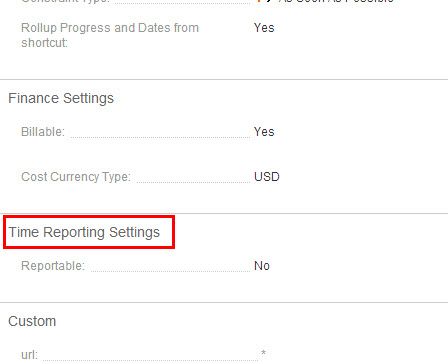
Figure 1: Time Reporting Settings - Click the Reportable value field to open the Reportable control.
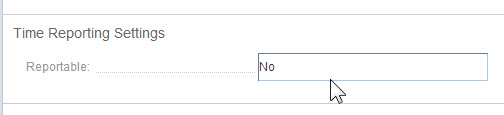
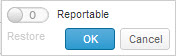
Figure 2: Reportable Dialog - Click
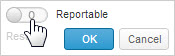
 changes to
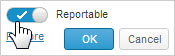
- Click

The work item is set as reportable.
The change appears in the Properties Card Time Reporting Settings section.
The Allow Reporting on sub-items switch becomes disabled, hence reporting on the sub-work items is automatically prevented.
Tip:
The option to click the Restore link restores the setting to its previous setting.
Reportable Start Date
The Reportable Start Date field represents the item's Start Date or Reporting Start Date, whichever is earlier. The Show Future Work Items filter is based on this field.
Setting Work Items as Non-reportable
- Follow Steps 1 through 3 of the above procedure.
- Click
 changes to
The work items is set as non-reportable.
The change appears in the Properties Card Time Reporting Settings section.
The Allow Reporting on sub-items switch is automatically enabled, indicating that sub-items can be set as Reportable and are added to the Timesheet report.
Tip:
The option to click the Restore link restores the setting to its previous setting.
Excluding Entire or Specific Work Items
To exclude the whole project or a specific branch in the project tree, milestone or hammock task, disable both the Reportable and Allow Reporting on sub-items switches.

Setting Actual Effort Updated From Timesheets
Note:
For Admin users only.
- Follow Steps 1 and 2 of the first procedure on this page.
- Click the Actual Effort Updated from Timesheets value field to activate the control.

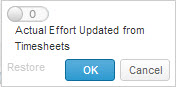
Figure 3: Actual Effort Control - Click
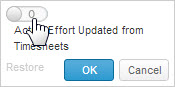
 changes to
- Click

The work items is set as Actual Effort Updated From Timesheets.
The change appears in the Properties Card Time Reporting Settings section.
Tip:
The option to click the Restore link restores the setting to its previous setting.
Overview Fields
The Overview standard field in Property Cards allows you to enter lengthy descriptions with rich formatting options, such as font size, color, etc. as well as tables.
The Overview field can be found in Work Items, Cases and other objects.

You can add 5 additional fields that behave like Overview fields, and give them any label.
The additional fields can be used in Configurations/Customizations.
Benefits include:
- Provide additional rich context to objects, with more visibility
- Customize labels to suit your organization's requirements
How it Works
- Go to Settings > Configure.
- Locate or search for the Overview fields under Standard Fields.

- Click Edit to give the field a name and to make further modifications as needed.

- Click Save.
- Don't forget to add the field to your Profiles' Property Cards.
Note: The 5 new fields are in addition to the existing Overview field. The existing field cannot be relabeled.
Some of the images are broken (last three). Also, I'm trying to figure out what the "Leaf Tasks Progress Reporting Policy" does. A link to more information would be appreciated!
Update: To answer my own question: If set to 'Individual', then in the timesheet page, it will show a popup if you want to update progress and there you can specify the progress per user that is assigned to that task.