
Overview
Apply filters on dashboards. In the dashboard's view and edit modes, you can now select the filter values for panels (reports) that include run-time filters.
Applying filters at the dashboard level makes it easy to view the same Dashboard from different business perspectives. So now you can create a single dashboard, and each viewer can apply their own filters, removing the need to create multiple dashboards for multiple programs, projects, etc.
For example, see all reports in the dashboard filtered by a specific Project, and easily switch between Projects directly in the dashboard.
How it Works
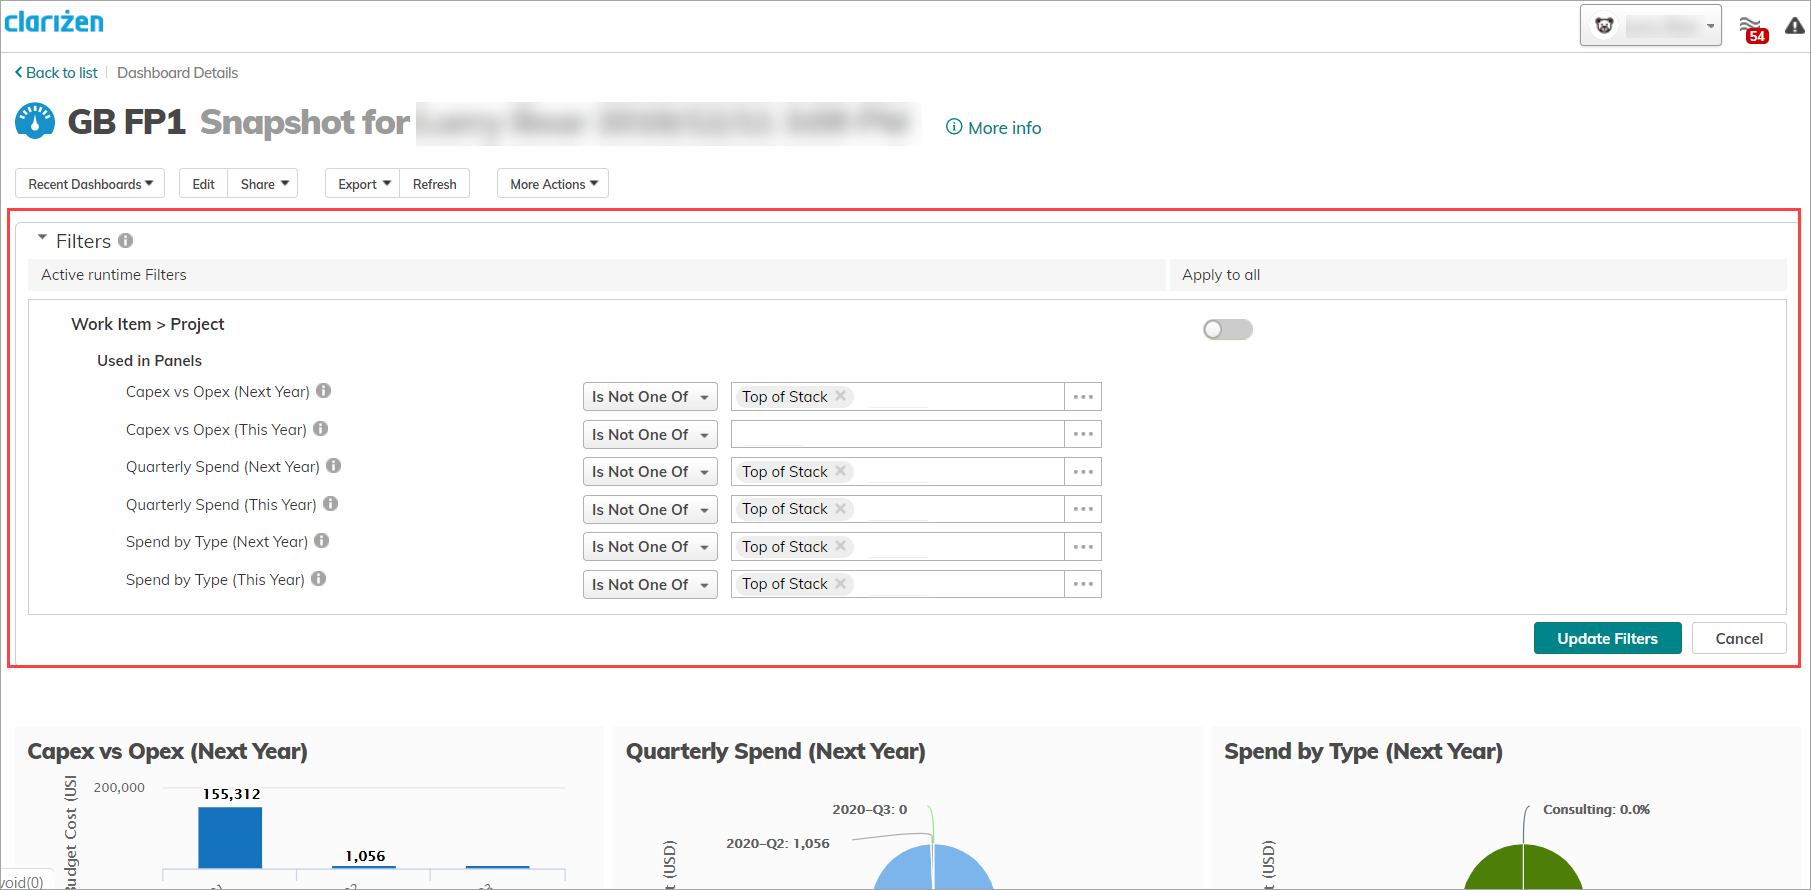
- In the Dashboard (edit or view mode), open the new Filters panel.
All filters used in participating reports are displayed. - For each filter, define the filter value.
Use the Apply to all option to see the same filter value across all panels (reports) in the dashboard, for example, view data for a specific Project in all reports.
Note: Filters are only applied where filters exist in the report. Filters do not apply (and do not override) where the original report does not have a filter. - Click Update Filters to refresh the dashboard with the updated filter values. The updates apply to the current user. So after updating your preferred filters, they will be applied when you next open the dashboard.
Notes:- You can update filters once every minute.
- To create a new snapshot of the dashboard, you must refresh the dashboard or update filters.
The Filters panel in the Dashboard
Cancel Filters
When viewing a Dashboard, you can cancel changes you made to run-time filters using the Cancel option. Filters are reverted to the last saved state in view mode, and not necessarily to the last saved state in edit mode.
I am unable to make my filter apply to all of the report in my dashboard. Clicking on the toggle does nothing. What am I doing wrong?