Creating Custom CSS to remove items from Clarizen is actually quite easy if you know a few basics. First, to remove an object from view, you need to use {display:none;}. This tells the system to remove the object from the location. The other necessary step is to find the specific Object ID. Below is an example that will help...
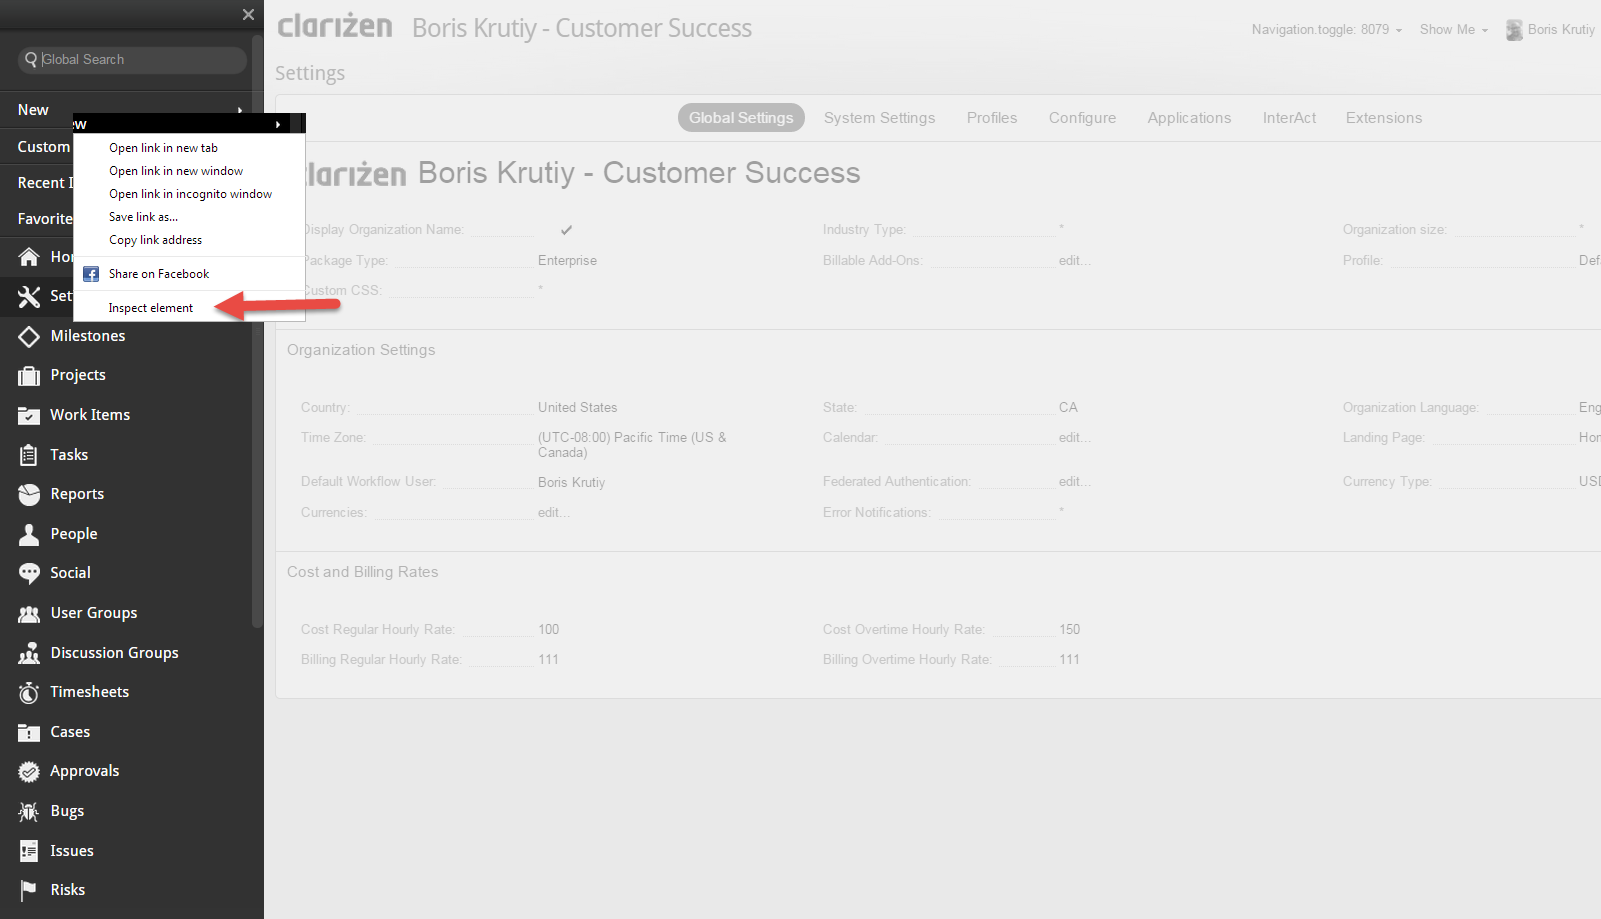
Example - Remove the NEW button from the Navigation Bar. The Use Case can be where you want your users to create Projects only from the Projects Module or via Custom Actions. In order to find the Object ID, you will need to use Chrome so that you can inspect the element. Then you need to go to the Navigation Bar, right click on NEW and Select Inspect Element.

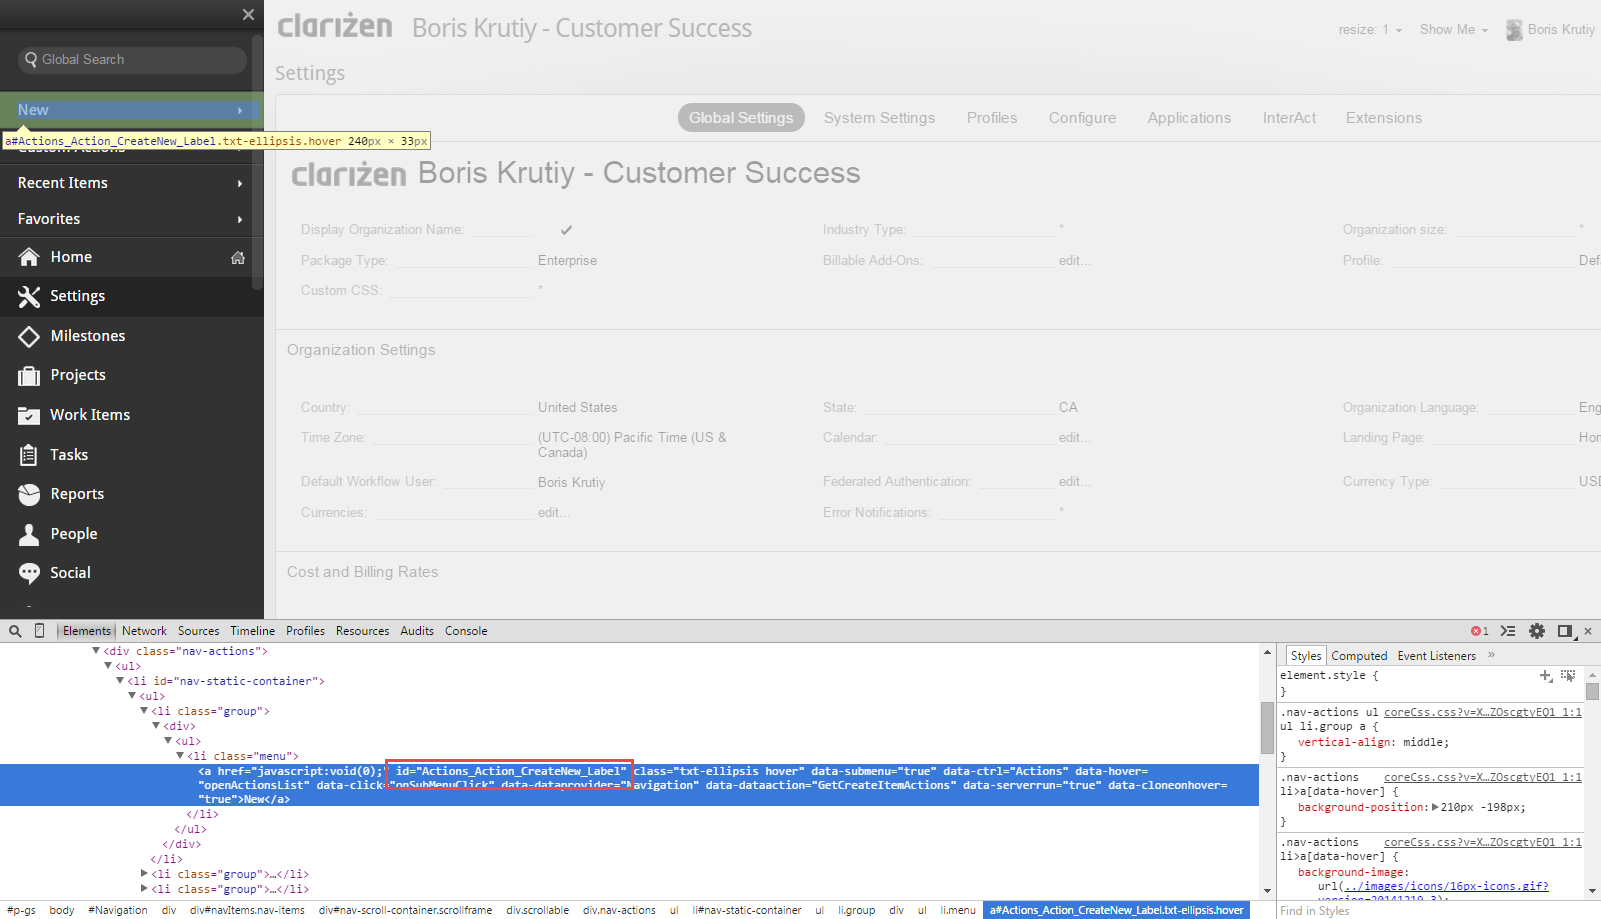
In the bottom of the screen, you will see the Menu information highlighted. You will need the ID specified (WITHOUT QUOTES)...

In this scenario, the ObjectID is Actions_Action_CreateNew_Label. Once you know this, then you are ready to add this information to the Custom CSS field within your Organization. This requires Admin permissions. Go to Settings --> Global Settings and find the Custom CSS field. If you are not showing it, you can use the search field to find it. Double click on the ' * ' and enter the following...
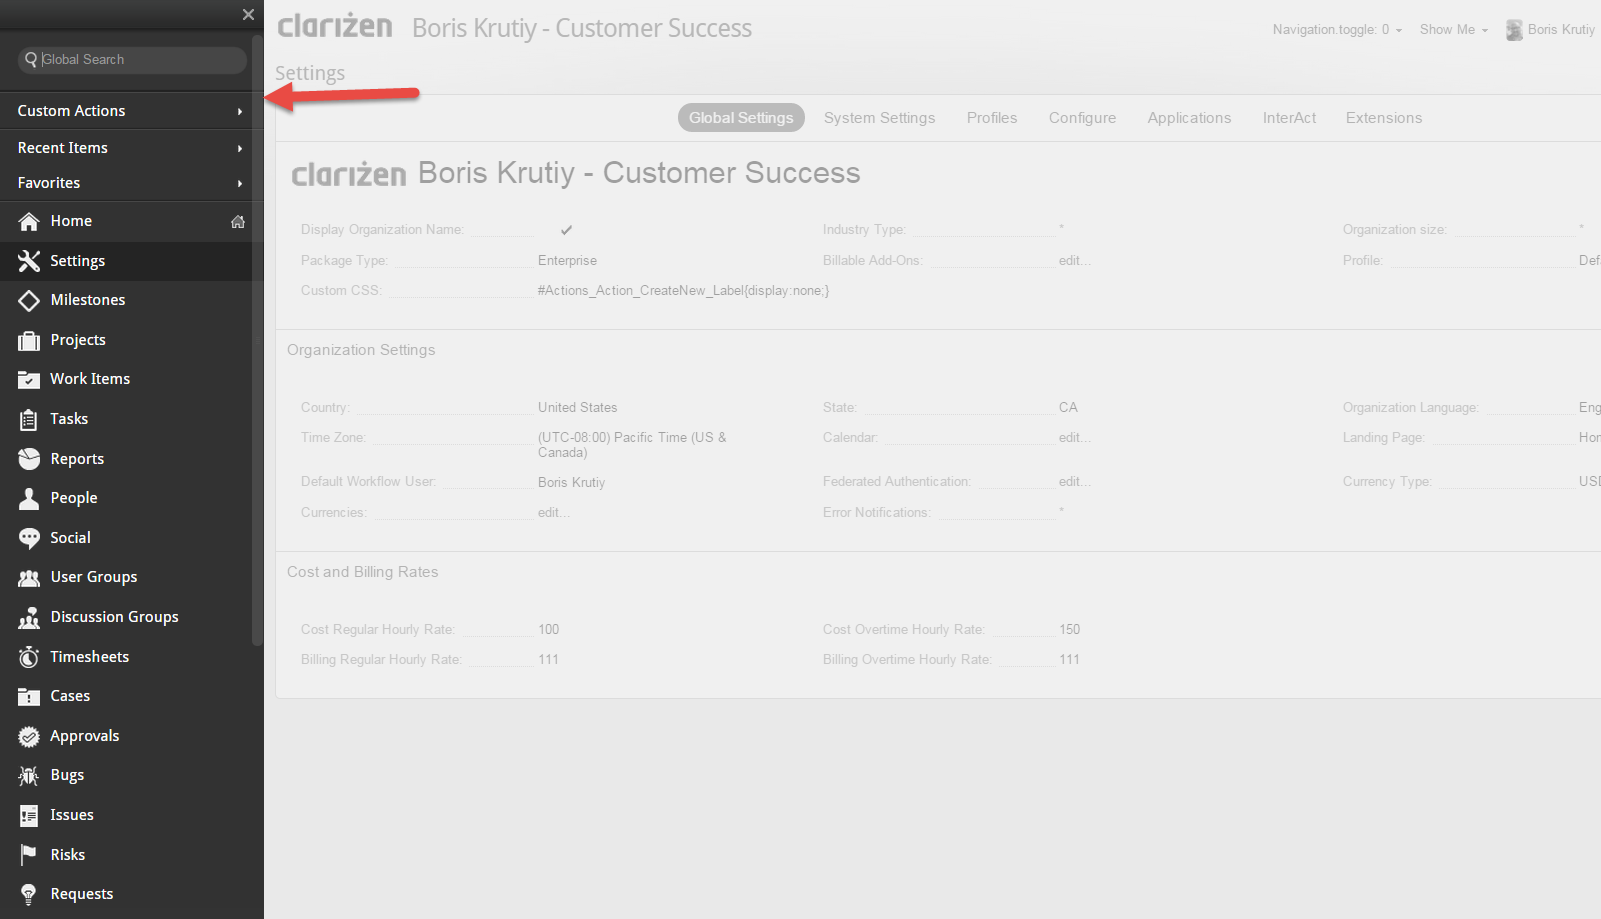
#Actions_Action_CreateNew_Label{display:none;}
You will see that the NEW object in the Navigation Bar is now removed...


