
Overview
Export Excel spreadsheets with existing data, add and update data offline, and import back into Clarizen One. The import process validates the data, highlights invalid data, and allows you to make corrections inline at the time of import.
This feature is supported for:
- Cases
- Customers
- Users
- User Groups
- Work Plan (Work Items).
To learn more about exporting and importing Cases, Users, etc., see Importing Cases.
To learn more about exporting and importing Work Plans, see Importing Work Plans.
Importing Cases
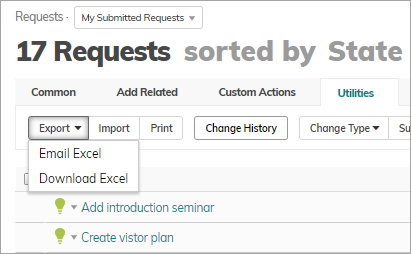
To export Cases, for example, Requests:
- Open the relevant module (Requests), and under the Utilities tab, click Export > Download Excel.
- In the downloaded Excel file, add, update and delete entries.
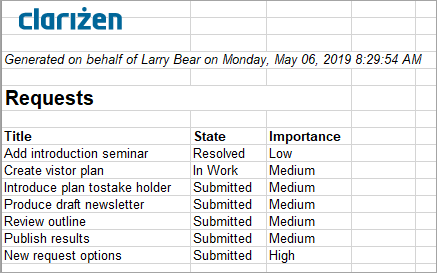
- Save the file.
- Import the updated data. Under Utilities, click Import. Select the file and click Open.
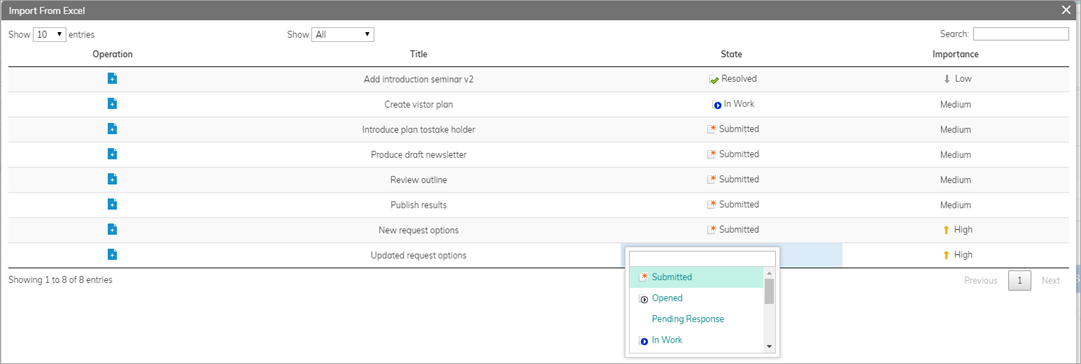
- In the Import from Excel window you can view all the new and updated data. You can also see errors and update (change entries) using the drop-down lists.
- When done, click OK.
Importing Work Plans
From the Work Plan view you can export the Work Plan to Excel. You can use the exported file to create complete Work Plans or modify existing ones offline.
The process supports importing new Work Items into Projects with basic dependencies between them. The Export action downloads an Excel spreadsheet that adds the ID, parent and parent ID fields, which can be used for advanced import features.
- In the Work Plan, open the Utilities tab. Click Export > Export Work Plan.
- Select Work Offline then import updates back into Clarizen > Export.
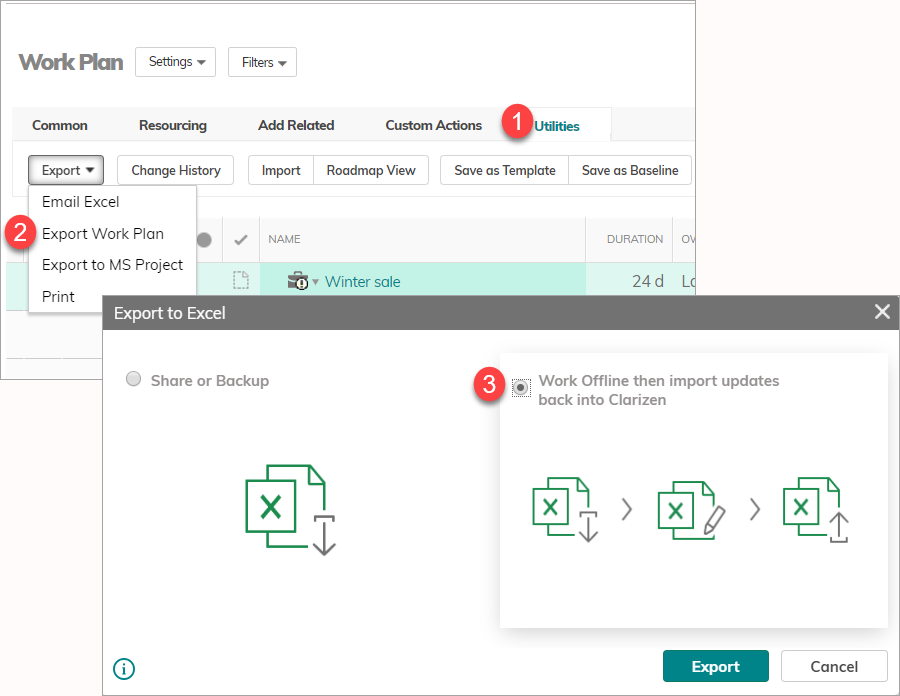
Note: Enable Advanced Export Work Plan in System Settings must be enabled. If disabled, clicking Export to Excel will by default export for Share and Backup, which can be used to back up a snapshot of the Work plan. Click here to learn more.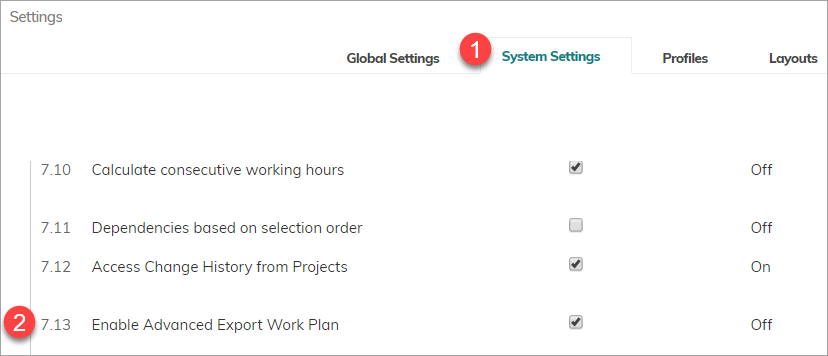
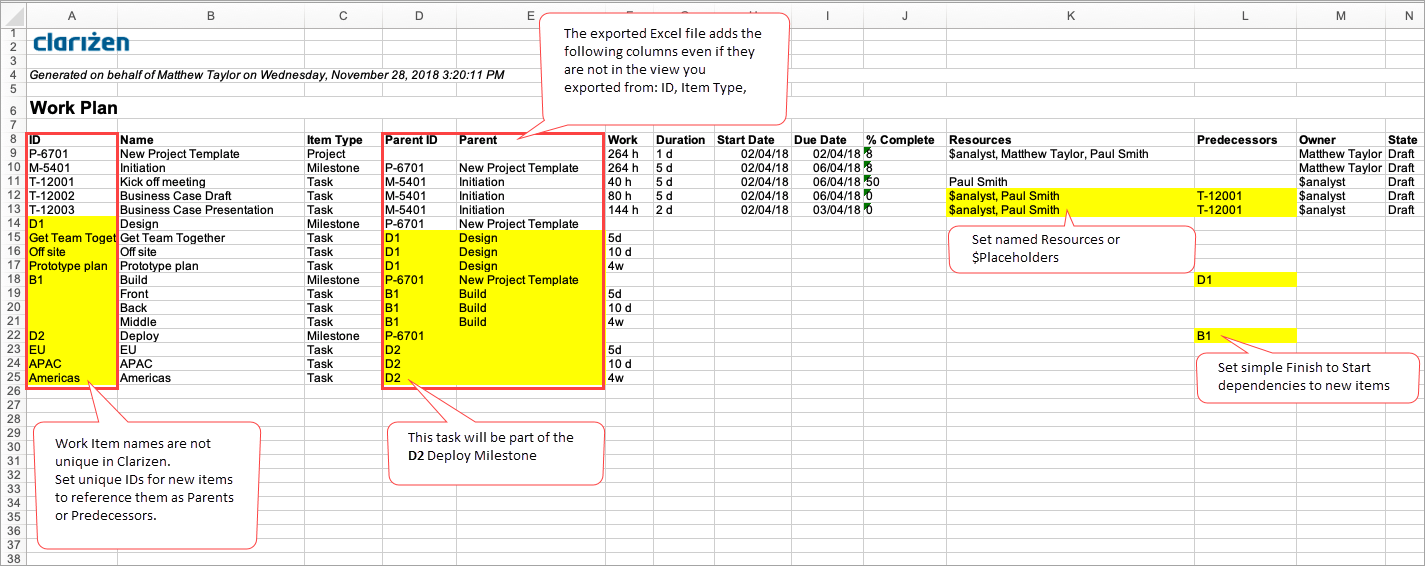
- The Work Plan is exported with the columns present in your current view and adds the fields required for adding and updating Work Items.
The following fields are added to the Excel file even if not present in the current view:- ID
- Parent Name
- Parent ID (a feature added to support importing hierarchies)
- Item Type (Project, Milestone, Task)
- In the Excel file:
- Add new Work Items as new rows.
Setting an ID is not mandatory, but you can enter a unique ID with any text, which can be used for dependencies and parent-child hierarchies. The ID you set will be replaced with a real system ID after import. - If you do not enter dates, they will be inherited from the parent Work Item.
- State (Requested, Draft, Active) is inherited from the parent Work Item, and cannot be set by the Import.
- Add new sub-items. For sub-items, enter the Parent ID.
- You can add new rows in between hammocks as needed. If you are adding a new hierarchy, use the unique ID you've manually set.
If you add new sub-items to a completed Work Item, the parent will become 'Active'. - Edit Work Items and additional details as needed.
Note: If you use Excel's Replace All function to edit multiple cells, you must first change the search option from Search By Rows (default) to Search By Columns.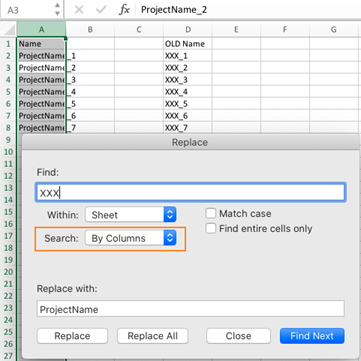
- Dependencies: Add simple Finish to Start (FTS) dependencies by adding the IDs of the predecessor items. Add multiple predecessors by separating IDs with a comma ",". If you do not have predecessors in your existing plan, add a column to your Excel file.
- Add new Work Items as new rows.
- Save the updated file.
- In the Work Plan (in Clarizen), open the Utilities tab. Click Import to select the updated Excel file and upload the file.
- In the Verification window, you can add and update additional details.
Note: Only added/updated Work Items are displayed in the verification window.
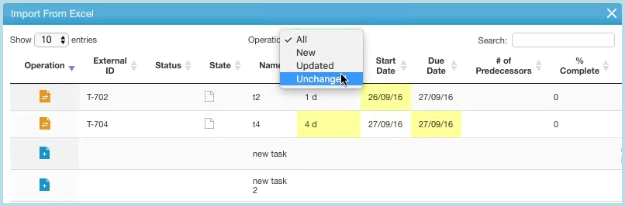
In the Import from Excel window, you can:- View all data. Color-coding is used to identify new vs. updated data. The yellow icon in the Operation column indicates updated records, while the blue icon indicates new records. Use the drop-down list at the top to filter data.
- View invalid data and a corresponding error message.
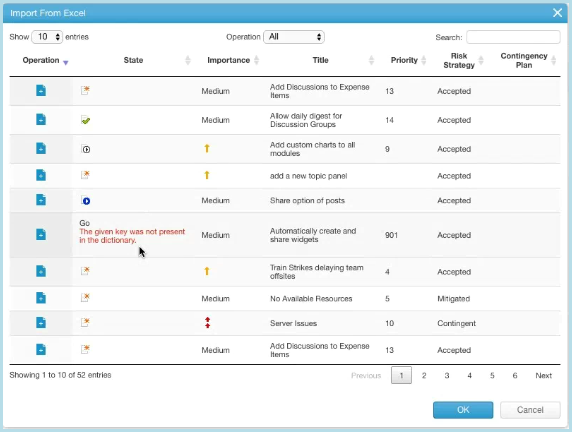
- Correct invalid data inline by choosing a value from the drop-down list. Use pagination to review all records.
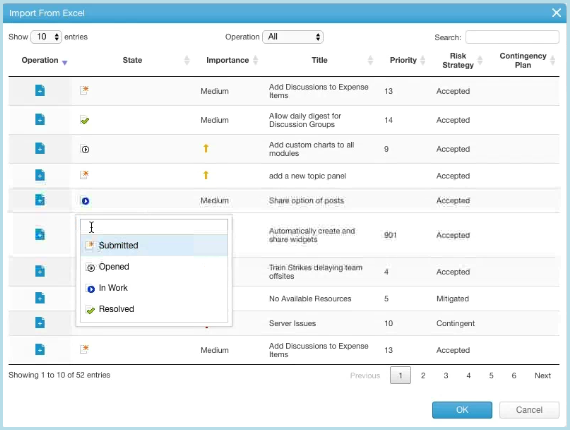
Once updated, the data is highlighted in yellow.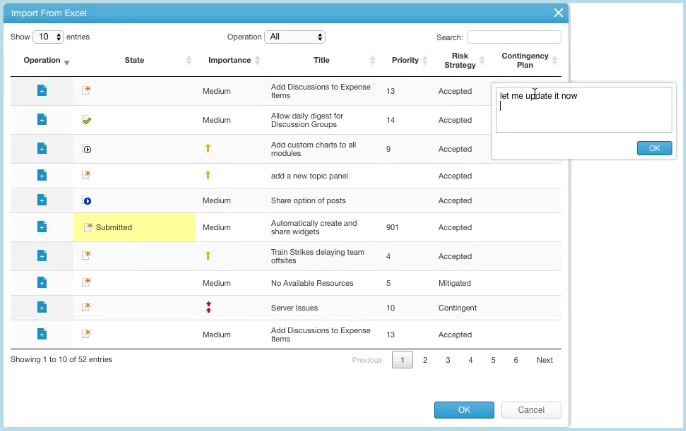
- View all data. Color-coding is used to identify new vs. updated data. The yellow icon in the Operation column indicates updated records, while the blue icon indicates new records. Use the drop-down list at the top to filter data.
Additional Information
- Import does not allow you to delete Work Items in Clarizen
- You cannot add new parent items above the existing Project
- Import creates regular work items only, and does not support Recurring Tasks or Shortcut work items
- You can set dates for work items in Requested, Draft, Active or On Hold states.
- Cancelled items: You cannot add new sub-items under Cancelled Work Items.
- Scheduling: If you set both Start and Due Date and a Duration, the Duration will not be imported.
Hi, this manual says twice "To learn more how to import data and make inline data updates, refer to Import from Excel." However the link provided doesn't include any instruction. Reading through the manual I experience difficulties to understand how to import a brand new project from Excel and I have the feeling the features works only for the case of an update.
Agreed with Chris. The Import from Excel link is useless as it is of no use. It only takes you to a table of the items you can import to and references to the Clarizen Lab which is no longer applicable. The newest release already includes the ability to import excel spreadsheets. More information is needed to import a new excel sheet to a new project.